Publish your app on the App Store
The 9 steps of the App Store tab: Apple Developer account, App Store Connect API key, Bundle ID, app record, iOS build, TestFlight, listing and review.
On this page
The App Store tab of the Publish to the stores card (in Dashboard › Mobile) takes your app from the project to Apple's review, in nine steps. FromScratch does the technical part with an API key you create once: certificates, builds, TestFlight, listing and submission. Apple keeps a few things for you: the paid developer account, creating the app record and the privacy questions.
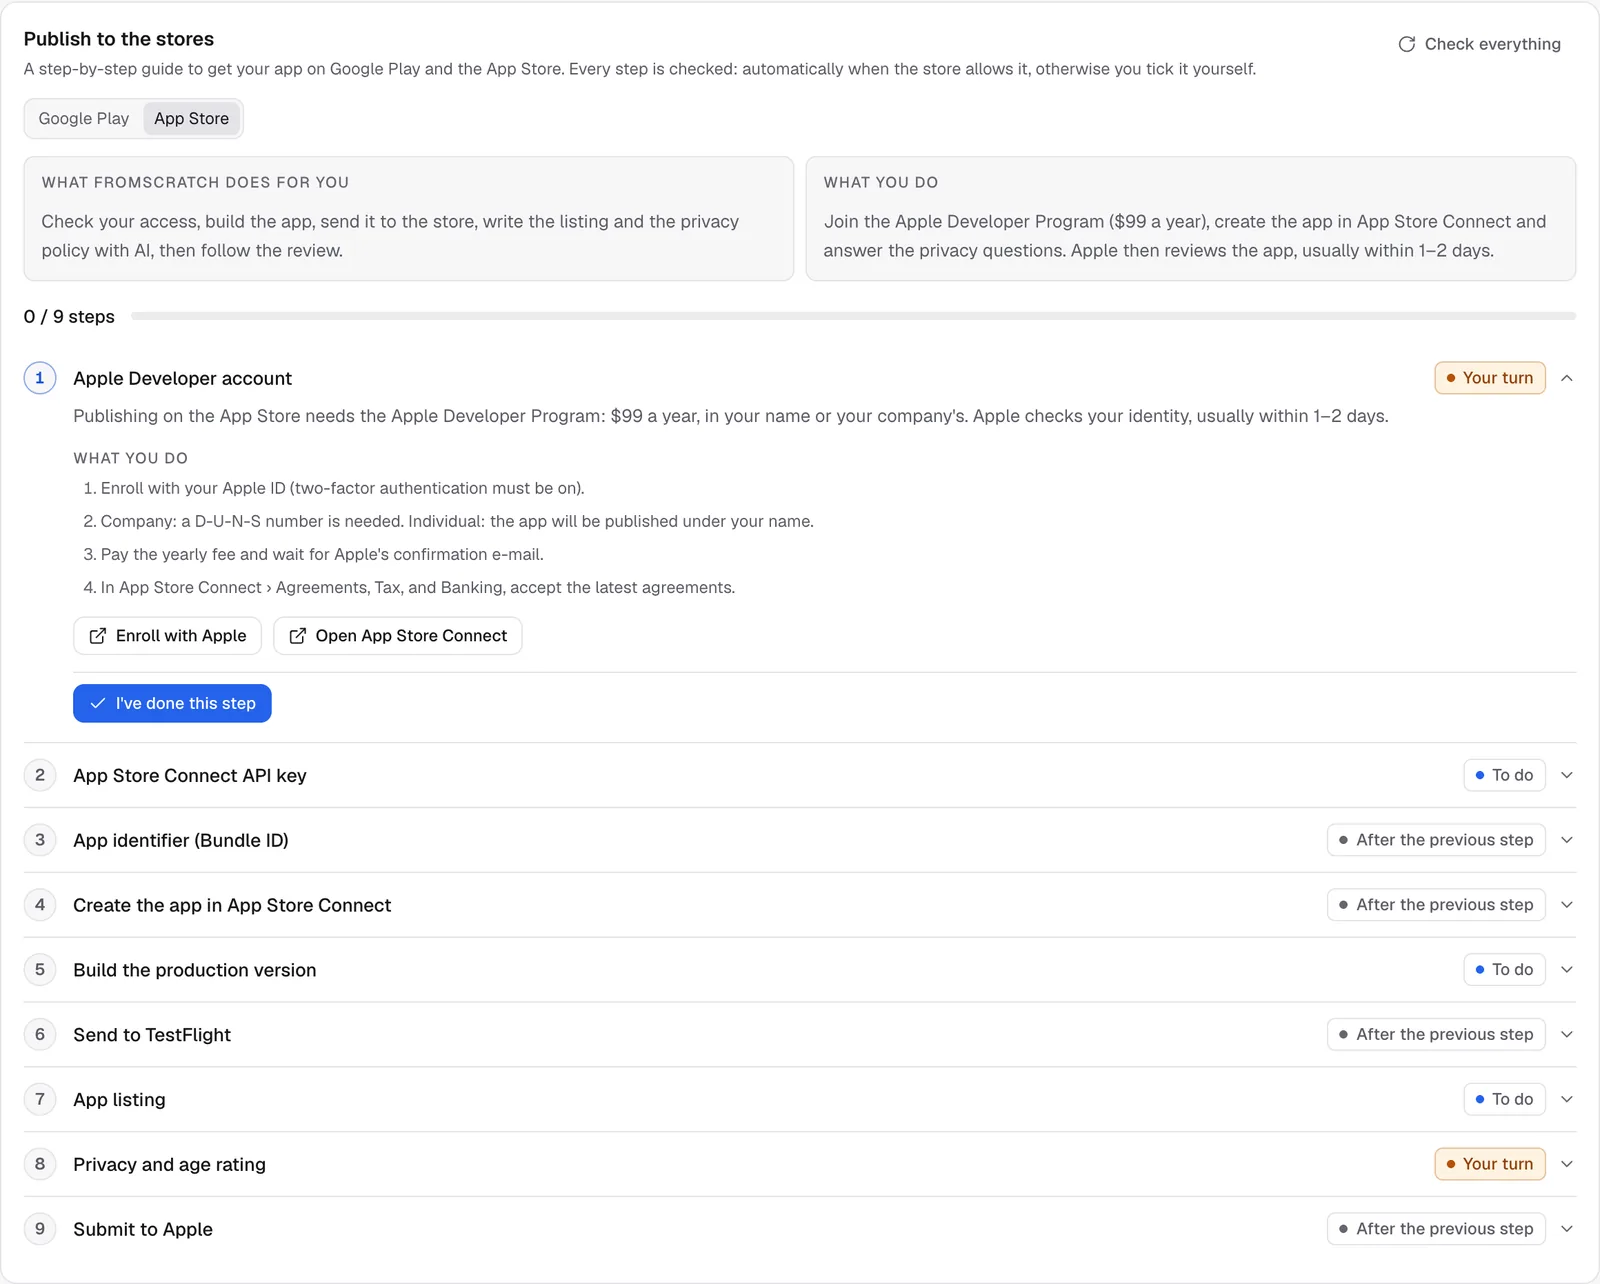
The steps work like on the Google Play tab: a status per step, Check, I've done this step for the steps you do in Apple's console, and Explain with AI when something goes wrong. See Publish your app on Google Play for the details. Store publishing is part of the Starter and Pro plans.
1. Apple Developer account
Publishing on the App Store needs the Apple Developer Program: $99 a year, in your name or your company's. Enroll with Apple opens the sign-up. Two-factor authentication must be on for your Apple ID; a company needs a D-U-N-S number. Apple checks your identity, usually within 1 to 2 days. Then, in App Store Connect › Agreements, Tax, and Banking, accept the latest agreements.
2. App Store Connect API key
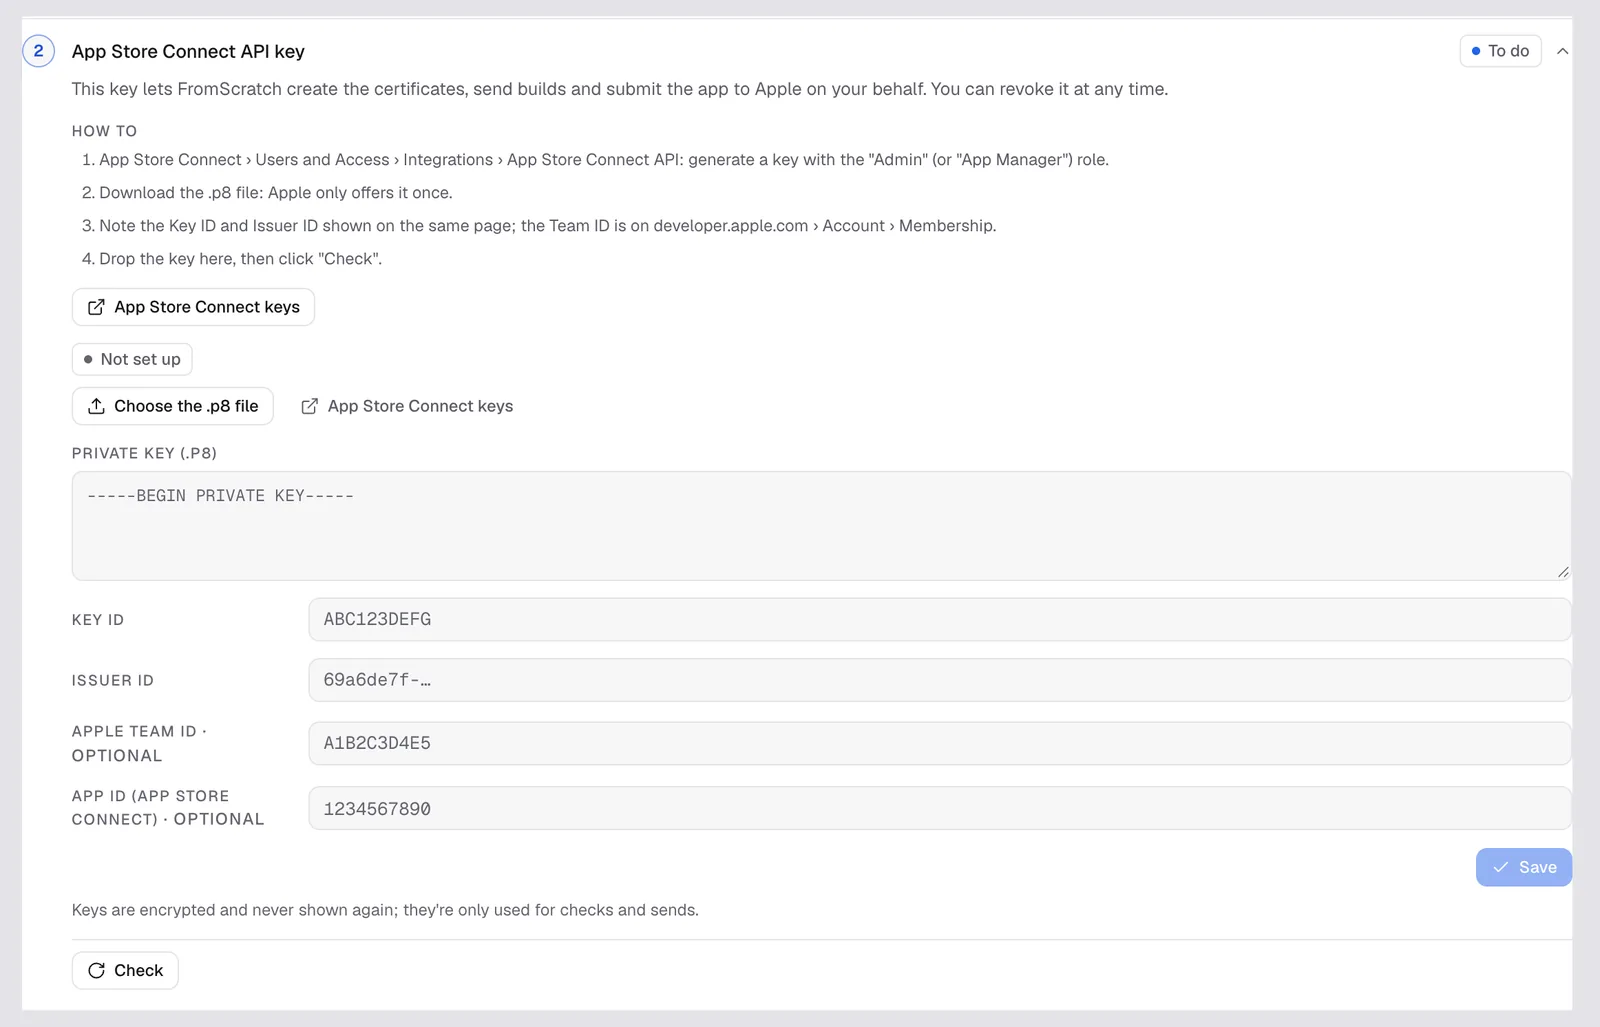
This key lets FromScratch create the certificates, send builds and submit the app for you.
- In App Store Connect › Users and Access › Integrations › App Store Connect API, generate a key with the Admin or App Manager role.
- Download the .p8 file: Apple only offers it once, keep it safe.
- Note the Key ID and the Issuer ID shown on the same page.
- In the step, click Choose the .p8 file, fill in the Key ID and Issuer ID, then Save and Check.
The Apple Team ID and the App ID are optional: FromScratch finds the app on its own once it exists.
3. App identifier (Bundle ID)
Apple identifies each app by a unique Bundle ID, the one in the App card of the dashboard. Click Register the identifier: FromScratch registers it in your Apple account. It can't change after publishing.
4. Create the app in App Store Connect
Apple doesn't allow creating the app record through its API. In App Store Connect › Apps › « + » › New App, choose iOS and paste the values shown in the step (app name, primary language, Bundle ID, a SKU such as the one suggested), choose « Full Access », then « Create ». Click Check: the step shows « App found in App Store Connect » with its ID.
5. Build the production version
Expo builds the iPhone app on your Expo account (15 to 30 minutes) and creates the Apple certificates with your key. See Build your app for Android and iPhone.
6. Send to TestFlight
Send to TestFlight sends the build to Apple, which processes it (often 10 to 30 minutes). You can then install it on your iPhone with Apple's TestFlight app before submitting. If Apple asks a question about encryption in TestFlight, answer it, or the build stays blocked.
7. App listing
Name, subtitle, description, keywords and privacy policy: AI drafts them and FromScratch sends them to App Store Connect. See Store listing and privacy policy. Screenshots (at least the 6.9-inch iPhone size) are added in App Store Connect, on the iOS version page.
8. Privacy and age rating
No API can do this part. In App Store Connect, for your app: App Privacy (paste the privacy policy URL shown in the step, answer the questions about collected data, then « Publish »), Age Rating and the category, Pricing and Availability, and the App Review Information (your contact details and, if the app needs a login, a demo account). Then tick the step.
9. Submit to Apple
Write What's new in this version, click Submit to Apple and confirm. FromScratch prepares the version, attaches the processed build and sends it for review. The status updates every minute: Waiting for review, In review, Accepted, waiting for release, then Live on the App Store. Apple usually answers within 1 to 2 days, by e-mail and here.
Tip
rejected? Apple explains why in App Store Connect › Resolution Center. Ask the agent to fix what Apple points out, make a new build, send it to TestFlight and submit again.
Related
Was this page helpful?
Thanks for your feedback!
Couldn't send your feedback. Please try again later.