Logs, your app's API and access keys
Read the logs of your preview and published site, browse your app's API routes, and create keys so other services can call it.
When something isn't working, the logs show what your app wrote when it started and while it runs. And if your app has an API (a React app with a server part), the API section documents it and lets you give access keys to other tools: Zapier, a CRM, an AI assistant.
Read the logs
- Open Dashboard › Logs.
- Pick a tab:
- Preview — frontend: the server that displays the preview's pages;
- Preview — API: the preview's server part (Python errors, requests);
- Published site: the live site.
- Check Auto refresh to follow new lines as they come in, or click Refresh.
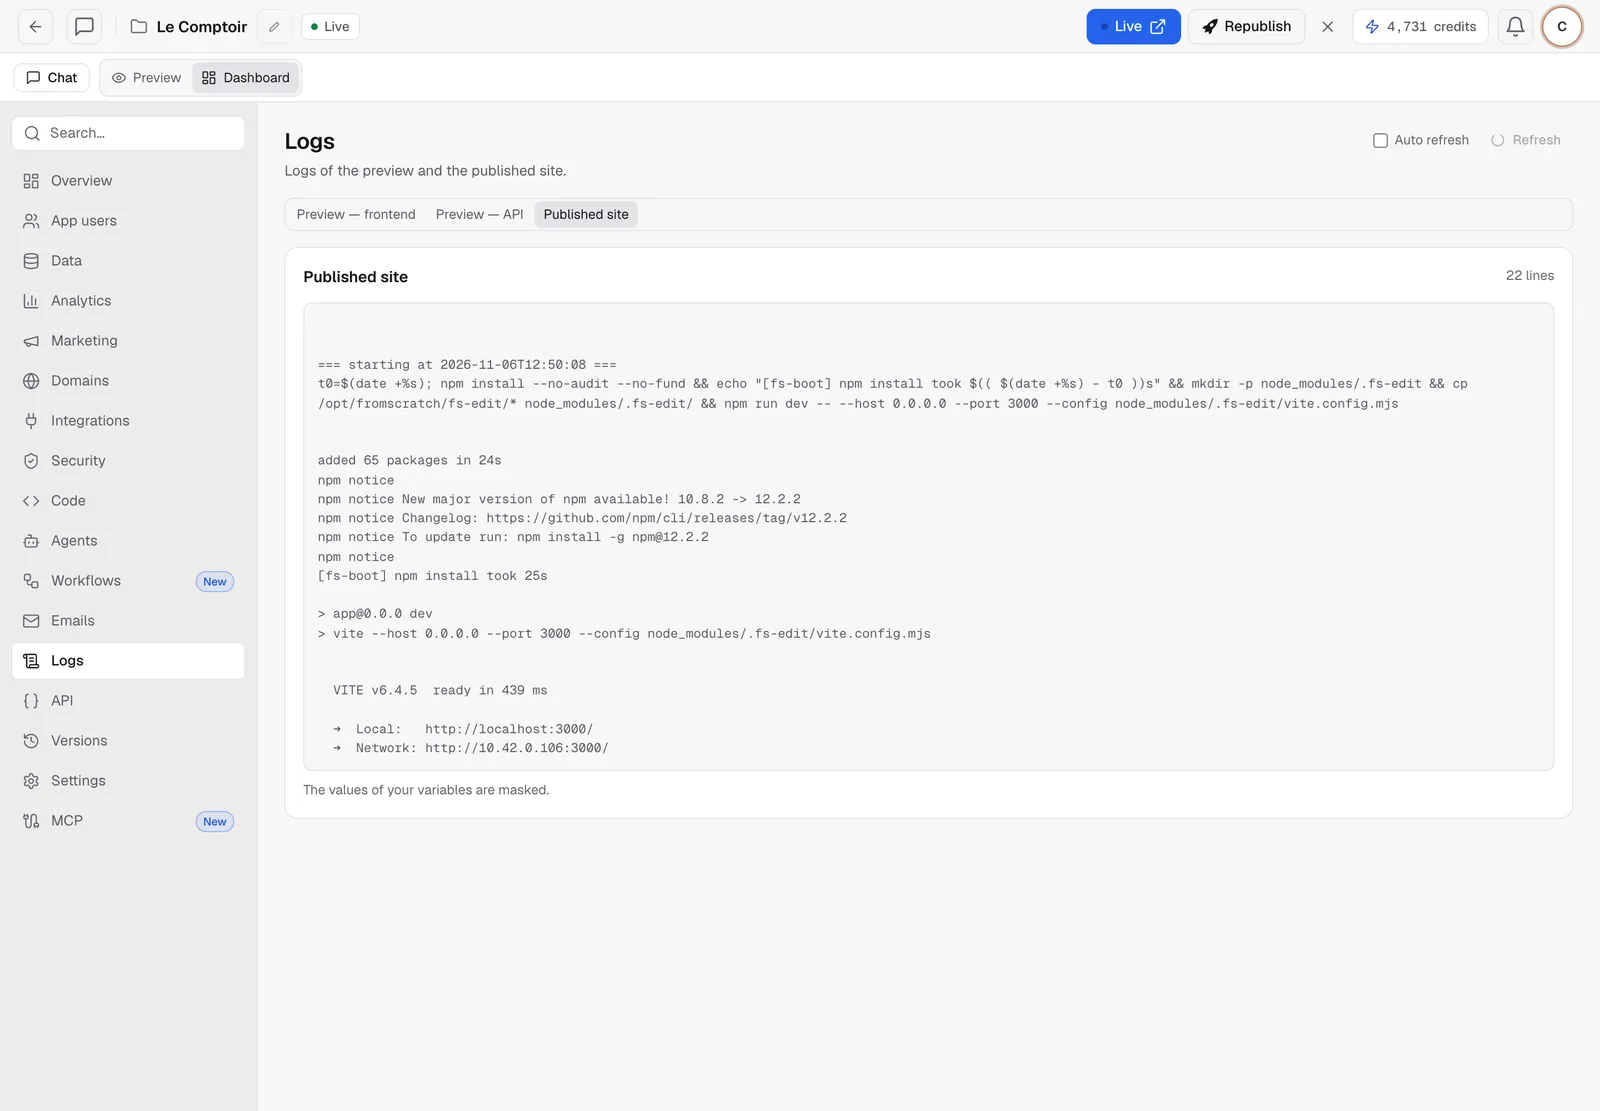
The values of your variables are masked in the logs. The preview tabs need the preview to be active. If it's asleep, open it first.
Tip
you don't need to understand every line. Copy the error and paste it in the chat: "Here's the error from the logs, can you fix it?" See also When something breaks.
See your app's API
The Your app's API card (in the API section) lists every route of your app: its method (GET to read, POST to send…), its path and its description. It also shows the Published API URL and an Interactive documentation link, where you can try each route.
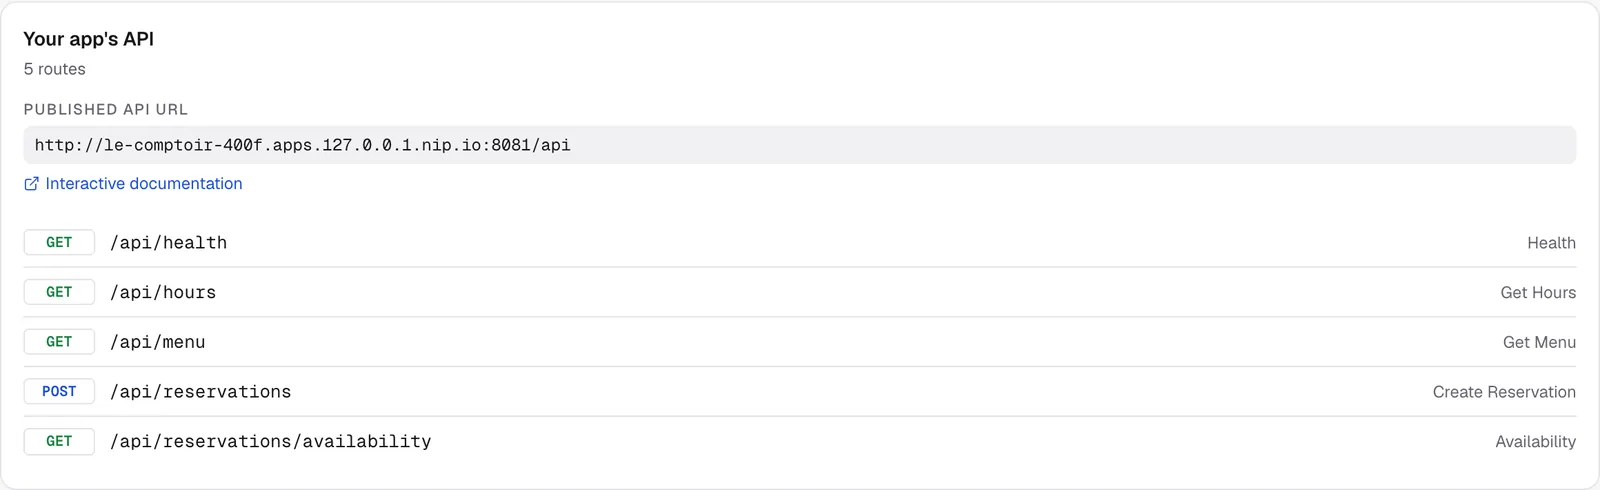
The list is read from the preview, so it has to be active. A store doesn't have this card. Its API is Medusa's, managed from its admin.
Create an access key
A key lets another service call your published site's API on your behalf.
- In the Your app's API keys card, give the key a Name (for example "Zapier").
- Choose the Access: Read (
GETrequests only) or Read and write (all methods). - Click Create a key.
- Copy the key right away. It starts with
fsk_and is only shown once. FromScratch only keeps a fingerprint of it.
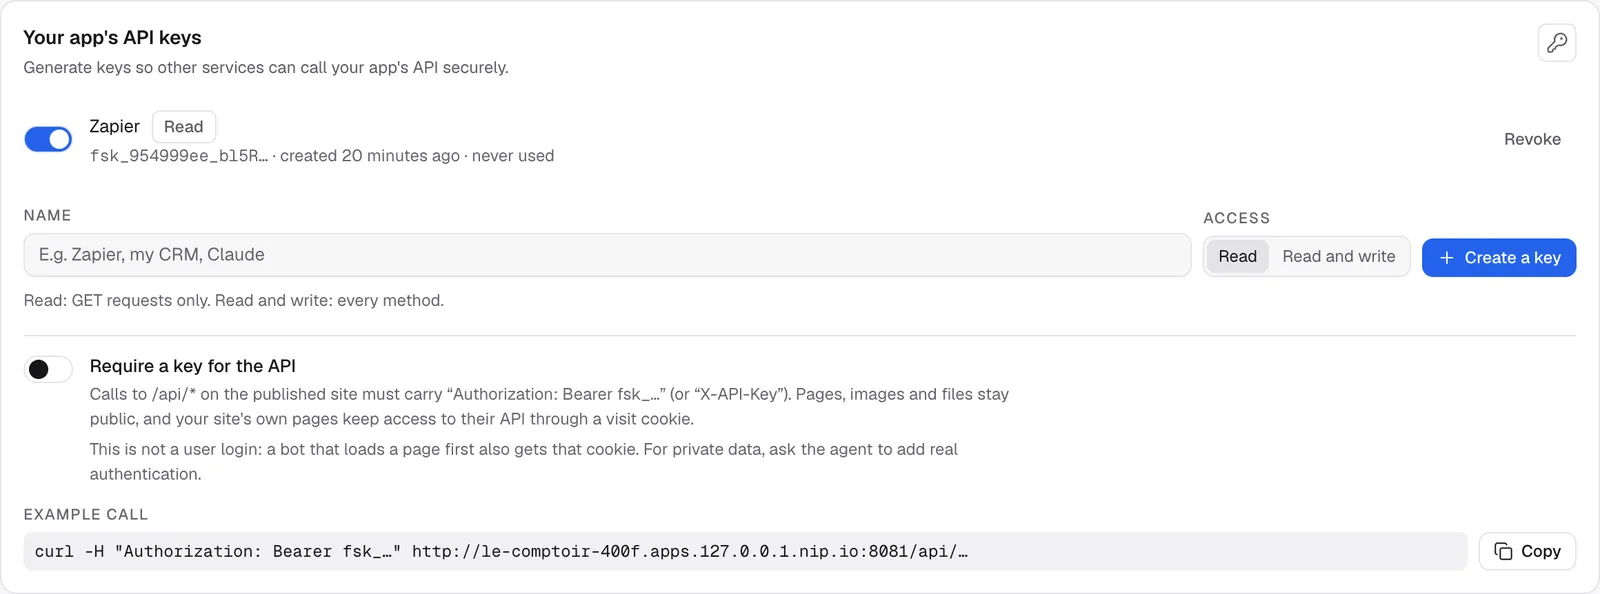
The switch to the left of a key pauses it. Revoke deletes it for good. The list shows when each key was last used. A project can have up to 20 keys.
Require a key for the API
By default, your published site's API is open, just like the site itself. Turn on Require a key for the API to limit it to people who have a key:
- every call to
/api/…must carry the headerAuthorization: Bearer fsk_…(orX-API-Key), otherwise it's refused; - a Read key used to write is refused;
- pages, images and files stay public, and your site's own pages keep calling their API thanks to a visit cookie.
The Example call shows the command to give a developer. Copy copies it.
Warning
this isn't a user login. A bot that loads a page first also gets the visit cookie. For truly private data (customer accounts, orders), ask the agent to add real authentication.
Turning the option on, or creating or revoking a key, updates the live site. It restarts by itself within a few seconds.
FAQ
The API card says it can't find any routes.
The preview may be asleep, or your project may have no server part. Open the preview, then click Refresh.
Can I connect an AI assistant to my app?
Yes. Make your API available over MCP with a key from this project. See Expose your app over MCP.
Related
Was this page helpful?
Thanks for your feedback!
Couldn't send your feedback. Please try again later.